▏시작하는 말
깃허브 프로필을 꾸민 게 벌써 1,2년 전이라 새로운 화면을 만들고 싶은 마음에 찾아보다 두 번째 사진과 같은 프로필을 발견해서 간단하게나마 꾸며보았다. 내 프로필이 마음에 든다면 이 게시글을 읽고 그대로 따라 하면 누구든 쉽게 만들 수 있을 것이다. 혹시나 처음 사진인 내 초기 프로필이 마음에 드는 사람이 있을까 봐 게시글 맨 마지막에 이에 관한 방법도 간략하게 설명해두었으니 참고하면 된다.
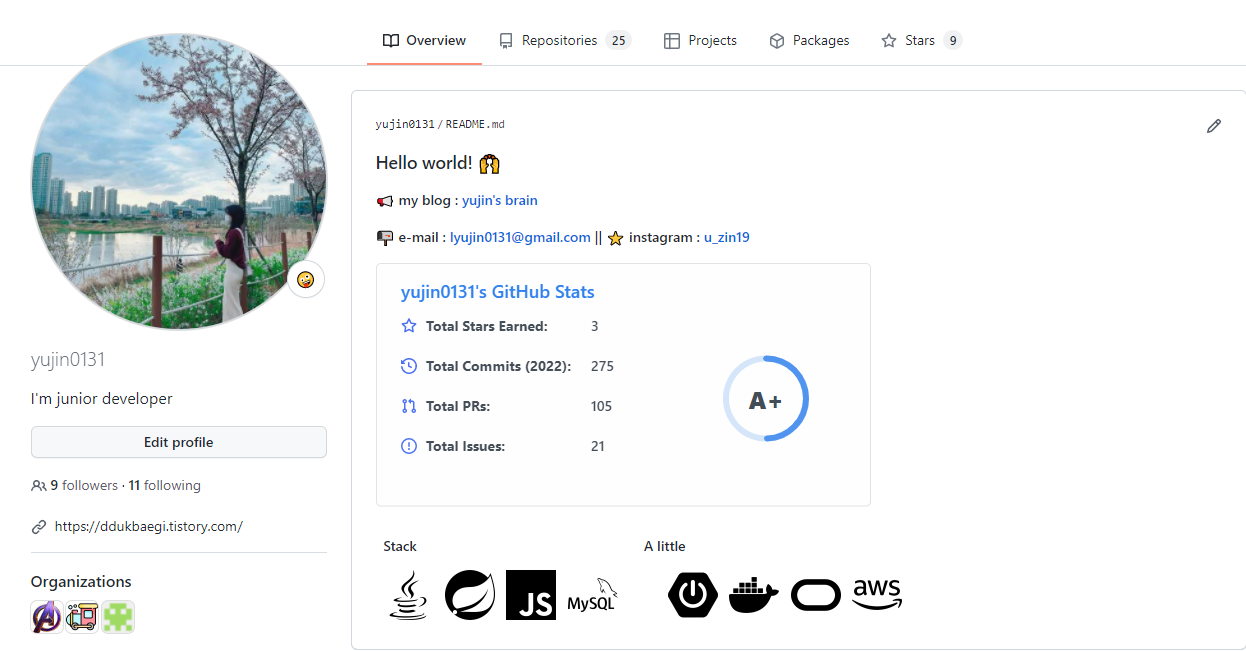
깃허브를 시작한지 얼마 되지 않았을 때 내 깃 화면
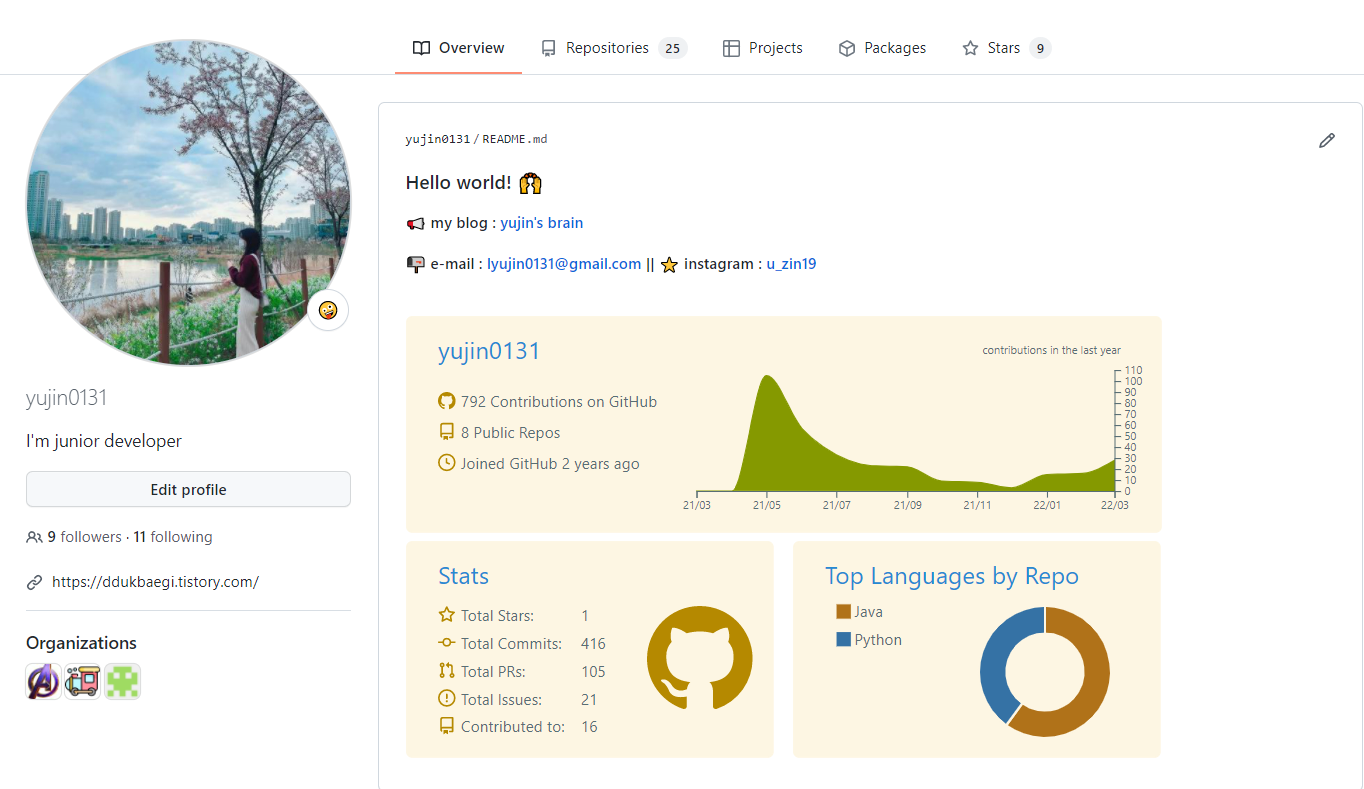
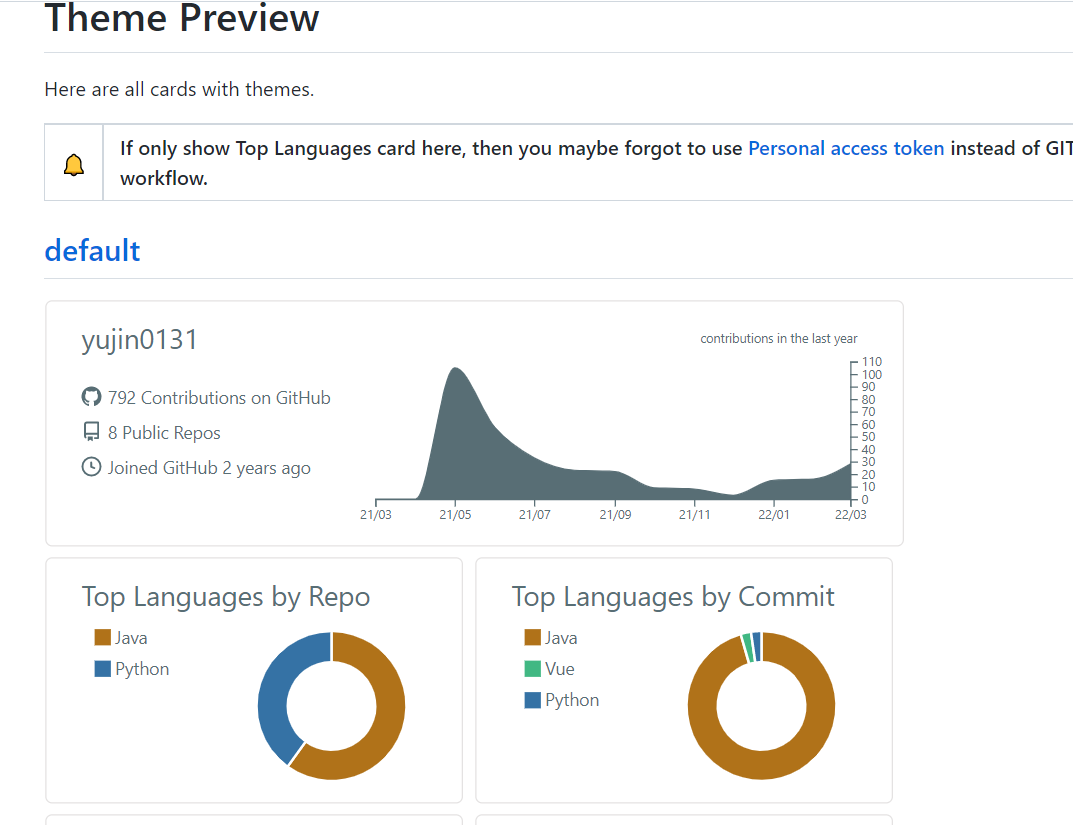
현재 내 깃 화면
조금 더 깔끔하고 화사해진 느낌이다
▏깃허브(GitHub) 프로필 꾸미기
1. repository
new repository > Repository name에 username입력 > public 체크 > create
2. GitHub Profile Summary Cards
- 1. 에서 생성한 repository를 clone 한다. git 명령어를 잘 모른다면 "Git 명령어 파헤치기" 읽고오면 좋다.
- clone 한 위치에 .github/workflows 폴더 생성
> .github 폴더 안 workflows 폴더
- .github/workflows 안에 profile-summary-cards.yml 파일 생성
- profile-summary-cards.yml 파일에 아래 코드를 붙여 넣기
> corn 명령어에 따라 그래프가 갱신된다.
name: GitHub-Profile-Summary-Cards

on:
  schedule: # execute every 24 hours
    - cron: '* */24 * * *'
  workflow_dispatch:

jobs:
  build:
    runs-on: ubuntu-latest
    name: generate

    steps:
      - uses: actions/checkout@v2
      - uses: vn7n24fzkq/github-profile-summary-cards@release
        env:
          GITHUB_TOKEN: ${{ secrets.GITHUB_TOKEN }}
        with:
          USERNAME: ${{ github.repository_owner }}
- commit, push > "GitHub에 로컬 프로젝트 올리기" 참고
3. profile-summary-card-output
- 깃허브로 돌아와 자신의 repository에서
Actions > Github-Profile-Summary-Cards > Run workflow > Run workflows
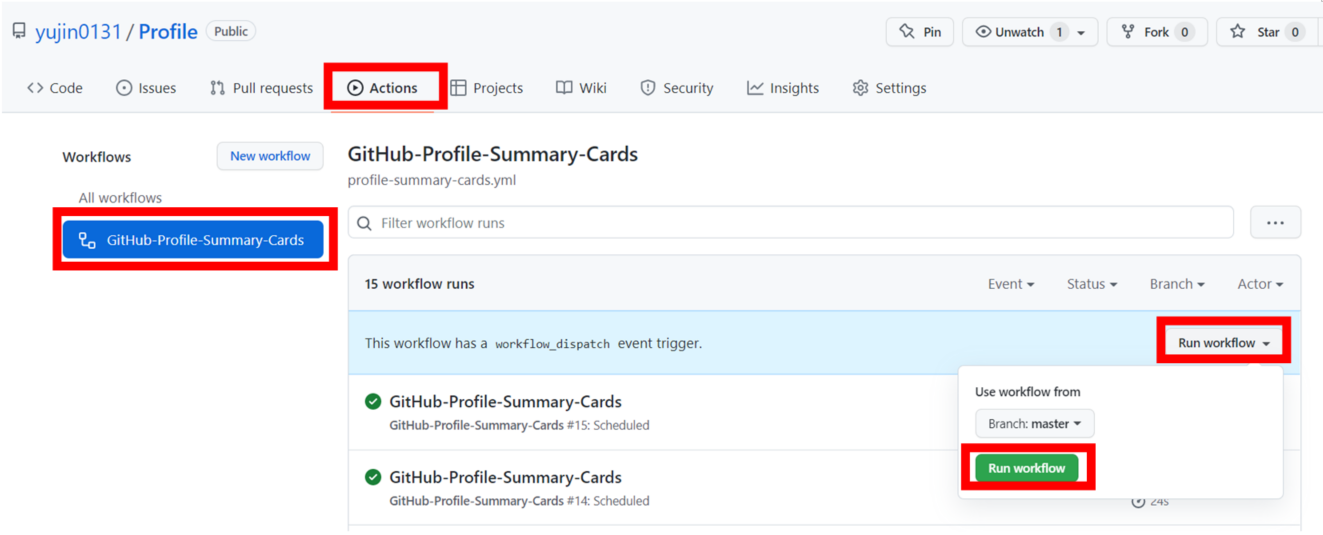
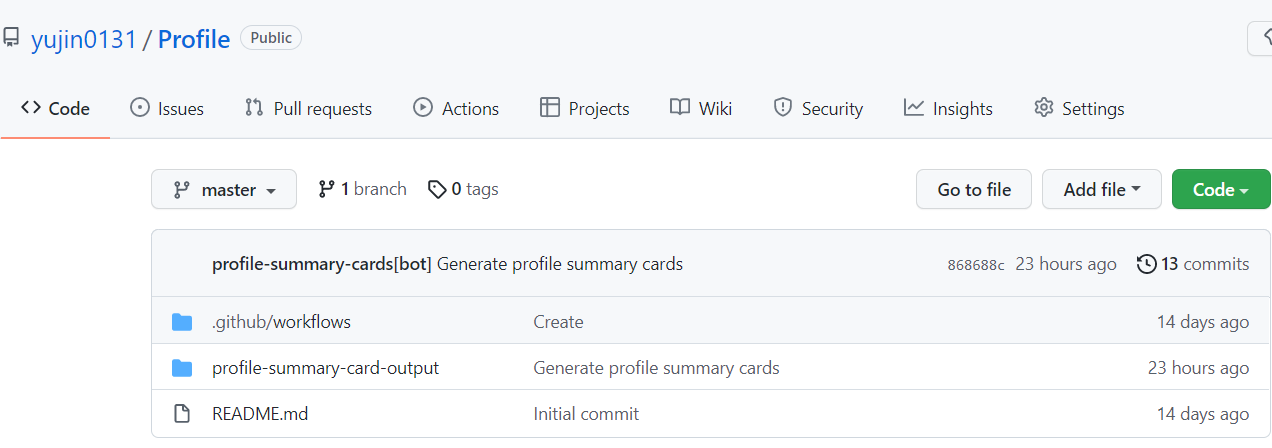
- repository 새로고침 하면 profile-summary-card-output 폴더가 생성된다.
4. 적용
- 자신이 원하는 테마의 폴더에 들어가 사용하고 싶은 그래프의 폴더 주소를 복사하면 된다.
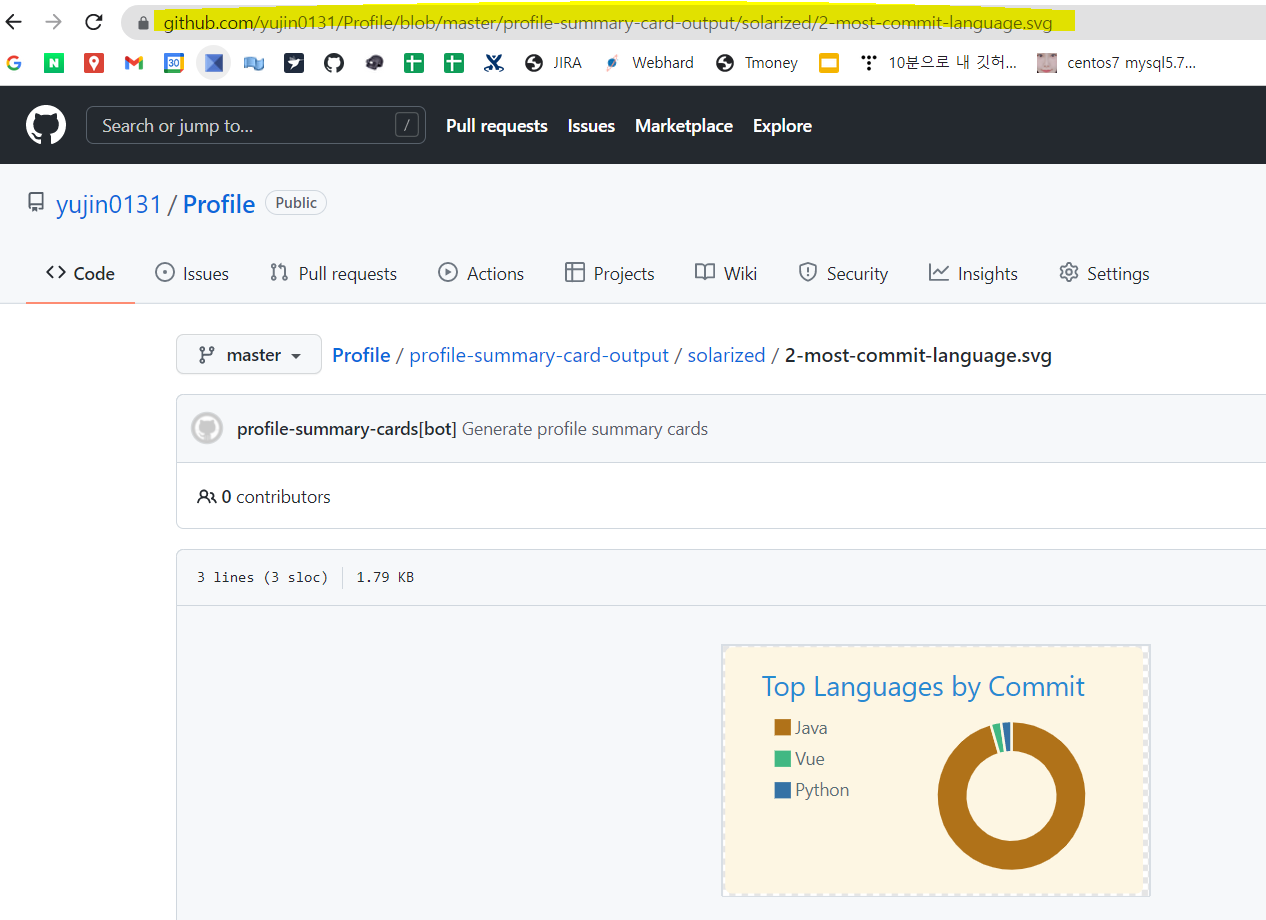
- 자신의 깃허브 프로필 readme에  형태로 붙여 넣으면 된다.

이렇게 하면 프로필 꾸미기 완료!
** 초기 프로필 그래프 **
 <a href="https://github.com/{username}/{username}">
  <img src="https://github-readme-stats.vercel.app/api?username={username}&show_icons=true&line_height=40&count_private=true&hide=contribs" alt="{username}'s GitHub Stats" />
▏참고자료
github-profile-summary-cards 툴을 만드신 분의 git
https://github.com/vn7n24fzkq/github-profile-summary-cards
'기초지식' 카테고리의 다른 글
| [JAVA] java.util.regex.PatternSyntaxException: Unclosed group near index 1 에러 해결 (0) | 2022.05.02 |
|---|---|
| [Eclipse] 이클립스 Gradle 프로젝트 Import 하는 법 (0) | 2022.04.21 |
| GitHub에 로컬 프로젝트 올리기 (0) | 2022.03.03 |
| 이클립스 설치하는 방법 (2) | 2022.02.08 |
| 형상관리 란? (0) | 2022.01.11 |


댓글